

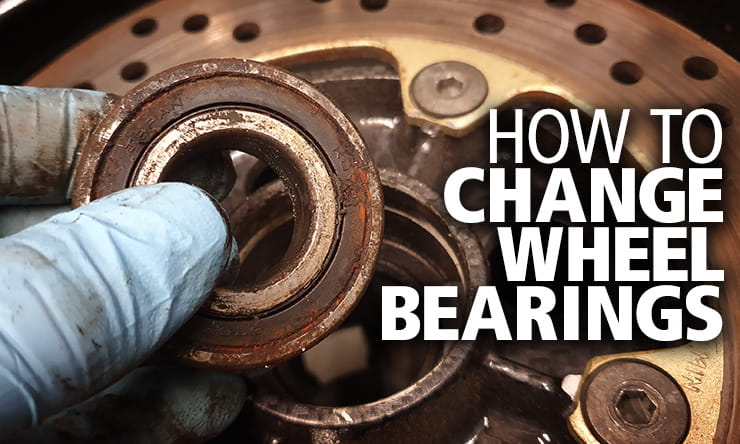
How To Remove Rear Wheel Motorcycle
Properly maintaining your motorcycle will not simply go along it safe, it'll mean it handles and performs at its very all-time. Being able to do some – or even all – of the piece of work yourself can relieve you lot money and requite y'all the satisfaction of getting even closer to your wheel…
How do I look afterward my bicycle bearings?
If the seals are in proficient condition around your bicycle's wheel axles, the bearings should exist fairly well protected. Go along the wheels clean, but don't get as well close with a pressure washer, which tin blow the grease out of the bearings, especially if they're an open design, like on the left side of my 1999 Kawasaki ZX-6R'due south rear.
Open bearings can sometimes exist accessed with the bicycle out – if you lot tin can see the balls, make sure you keep them packed with grease; I use Corrosion Cake from the makers of ACF-fifty, but there are lots of other suitable products available that run across or exceed the requirements of the NLGI (National Lubricating Grease Institute) for GC-LB. GC denotes use in wheel bearings on vehicles under mild to severe duty with the highest temperature ranges, while LB relates to a vehicle chassis and its components under balmy to severe duty, which can be exposed to water and other contaminants (there are also GA and GB, likewise every bit LA classifications for less severe environments).

A fix of bike bearings and seals can exist bought from Wemoto
How long should my wheel bearings last?
Your motorcycle's wheel bearings can concluding for 100,000 miles or more than if they're looked later on but bravado the grease out or riding through deep water tin can shorten their life, as can heavy impacts caused by off-road riding, wheelies etc.
Bearings with sealed faces should require no maintenance, only open-cage designs can exist worn out after just a couple of years of use if they're poorly maintained; the ones in this 18,000 mile ZX-6R's rear bicycle have had it.

Poorly maintained bearings tin can sometimes be obvious
How do I know when my bicycle bearings need replacing?
Worn bearing tin issue in vague treatment, simply don't wait until you discover that! With the wheel off the ground, check that it spins freely (don't confuse the brake pads licking with bearing noise).
Next grip the top and lesser of the tire (yous might accept to hold the spokes of alloy wheels or the inside of the rim if there's a fender in the way) and then endeavor rocking the wheel back and forth. Plow the cycle a little and so do information technology over again until you've rotated it a full 180°. Be sure that the bicycle itself isn't moving, but if you feel any knock or slight movement at all, it's a sign that the bearings are worn.
What parts practise I need?
Always supplant all of the bearings in a wheel, non just the ones yous recollect might be worn. Y'all should also change the seals every bit y'all'll need to prize them out to get at the bearings, and they're clearly non doing a slap-up job of keeping water out as it is…
Fortunately consummate kits are available from Uk motorbike parts specialist Wemoto, with a set including dust seals for the front wheel of a 1999 ZX-6R costing just £fifteen.60, and for the rear wheel only £24.00.

What tools exercise I need?
This article isn't intended to be all you need to modify the wheel bearings on any motorcycle. I'1000 basing it on my 1999 Kawasaki ZX-6R, but your bicycle volition have its own unique needs, so I thoroughly recommend buying a Haynes workshop transmission offset. My promise is that this volition requite yous the confidence to have on the job for yourself, but just with a workshop guide specific to your motorcar will you accept the correct process. Remember that Bennetts customers tin salvage a massive xl% on Haynes manuals at Bennetts Rewards. Yous'll also need the post-obit…
- Hammer
- Drift
- Flat-bladed screwdriver
- Pieces of woods
- Circlip pliers (not on all bikes)

Popping bearings in the freezer earlier fitting might make the slightly easier to fit
How do I change the wheel bearings on my motorcycle?
The bearings on my bike's forepart cycle looked and felt fine, while whose on the rear bike were getting pretty nasty. Both wheels require generally the same technique, with the rear normally being slightly more involved and carrying more bearings.
It's debatable whether it makes much difference, but putting your new bearings in the freezer over-nighttime tin can potentially make them a lilliputian easier to drift into the wheel – accept them out just before you fit them.

Step 1: Remove the wheel
Once you've taken the wheel out (recall it's ever much easier if you remove the caliper(s) first), lay the bicycle down on two lengths of wood that back up the rim but keep the restriction disc off the ground – this will protect the rim and the disc when you start hammering.
If you're working on the rear bike, as I am, pull the sprocket carrier off (existence careful not to have it stick then break free to fustigate you in the face). Watch for any cush rubbers or spacers that might fall out. We'll worry about the begetting in the sprocket carrier later, then put that to one side.


Step 2: Remove dust seals and circlips
On the rear, there'll probable simply exist a dust seal on the opposite side to the sprocket carrier but remove any that are covering the bearings; you'll be able to prize these out with a flat-bladed screwdriver.
With the seals out, wipe whatsoever grease away and check carefully for whatsoever circlips; there's one under the seal on the ZX-6R; using circlip pliers, carefully remove information technology and put it somewhere prophylactic as you'll need it again.

Step 3: Drift the commencement bearing out
Making sure the rim of the bicycle is sat evenly on the lengths of wood, and the disc or face up of the wheel isn't touching the basis, place a long drift down through the cycle until you attain the inner ring of the bearing on the bottom. It's really important that your drift has a skillful, straight confront so it doesn't ringlet off the edge – you need information technology to catch in order to release the bearing enough for the spacer to move more. If it'due south non flat on the terminate, grind information technology.
You lot desire the migrate to be pushed tight against the within edge of the top bearing, so that information technology's forcing into the opposite side of the bearing y'all're striking; don't try driving straight down.

This illustration from the Haynes manual explains how to position your drift
Using solid blows, start driving the bearing out, working one side, then the opposite side, and so 90° around, opposite to that so on until the begetting falls out of the wheel, likely followed by the spacer.

The spacer will likely fall out with the starting time bearing
Pace 4: Drift the other bearing out
Now flip the wheel over, making sure it's secure on the lengths of wood earlier repeating the process on the other bearing.
Once they're both out, cheque the wheels for whatever damage while giving the bearing seats a good clean – get whatsoever dirt out with a screwdriver or pick, and exist sure to make clean the groove for the circlip too.

An old spindle can aid get a damaged bearing out
Expert tip: What if my bearings have collapsed?
If your bike's bearings are so shot that the inner race has collapsed, you might non have any area to drive the remaining outer race out if it's flush against a face. Nick Nomikos, owner and MoT tester at The Two Wheel Centre in Harpenden says that all is not lost:
"If y'all can become hold of an old wheel spindle with a flared terminate that'll fit through, yous tin can use this to go behind the shell of the bearing."

Push the border of the sometime spindle against the begetting (note that there isn't a begetting here; we're just showing how to lever information technology).
"Enquire a mate to use a tyre lever to force the edge down confronting the back of the bearing while you strike it from the other cease; you should be able to get the begetting to start moving away – in one case information technology's crept, information technology'll simply get easier until it's free. If you're struggling, try warming the surrounding rim advisedly with an electrical hot air gun; remember, you need to heat the part that you want to expand."

Stride 5: Fit the starting time new bearing
Earlier plumbing fixtures the new bearings, find a socket that's big enough to only press on the outer edge of them, only will simply fit into the cycle (recollect that the outer races might be different sizes). If you don't have a suitable socket, you could grind the outer edge of the old bearings down, so they'll drop in and out of the wheel.
If the bearings you're plumbing fixtures don't have a grit seal covering the balls, pack them with grease on both sides.
At least one side of the bike will have a lip that determines the depth of the bearing; find this then place the wheel on the lengths of woods with the lip on the height.

Now take your new bearing and lay it onto the top of the opening (if it drops in, you've got the wrong size, or your bike is knackered!). I lay another piece of wood on top of the bearing, so hammer information technology downward until it's flush with the edge of the rim, making sure it goes in absolutely straight. To prevent damage to the new bearing, you could likewise use the erstwhile bearing laid directly on elevation and so hammer this, but only ever hammer the outer edge. Also make sure you don't continue driving the new bearing all the way down equally y'all'll get the old 1 stuck in at that place besides (unless it's been ground down).
Once the bearing is flush with the wheel face, hit your socket (or ground-down old begetting) with a wooden mallet or wood and hammer to drive the bearing to the bottom of the recess; you'll hear the tone of your hammering alter as it hits the lesser.

You could use a drift, moving around the edge of the bearing as you go, simply yous must brand sure you Only strike the outer border. Once again though, make certain y'all're driving the bearings in direct.
On the ZX-6R, this was the aforementioned bearing that required a circlip, so with the groove completely visible, pop in the new circlip and rotate it a little to make sure it's fully seated.

Don't forget the spacer!
Step 5: Fit the new bearing to the other side
At present flip the wheel over, making sure it's saturday safely on the lengths of forest before popping in the spacer (don't forget!). Repeat the process above to fit the second begetting, seating it confronting the spacer.
Don't keep hammering in one case the inner race of the bearing contacts the spacer or you risk damaging it. If the spacer is slightly offset, just knock it to the side with the drift until it lines upwards; you might detect it easiest to poke it into line with the axle before finishing.

Stride 6: Fit the new seals
On the front bike, you'll probable have ane seal to fit on each side; pack the backs (the open up side) of the seal with grease and wipe it effectually the inside and outside edges. If the new bearings are an open design, also pack some more than grease in if you can.
The new seals should just printing in by hand – at the virtually, you might need to tap them in with a piece of woods laid over them, simply fingers should be enough. Make sure the seals become in with the open side confronting the bearing.

Having to drive the begetting out using the inner race is where things could go wrong – if the bearing collapses, encounter the good tip in a higher place
Step 7: Replace the bearings in the sprocket carrier
If you're replacing the bearings on a rear wheel, chances are in that location's at to the lowest degree one in the sprocket carrier besides. The process is just the same every bit on the rest of the bearings, so continue an eye out for a circlip here, also as whatsoever spacers.
And that'southward it. Now just refit the wheels and check everything is fully secured and safe before riding. Brand sure at that place's no grease or oil on the brake disc or pads, and triple-check your piece of work before congratulating yourself on a chore well washed and coin saved.
If you can't do this job yourself, your dealer will be happy to take the piece of work on. While prices will vary, Nick Nomikos, owner and MoT tester at The Two Wheel Centre in Harpenden says he'd accuse labour of £24 per loose wheel to replace the bearings, or £33 if the wheels are nonetheless on the cycle.
Source: https://www.bennetts.co.uk/bikesocial/news-and-views/advice/bike-maintenance/how-to-remove-replace-motorcycle-wheel-bearings
0 Response to "How To Remove Rear Wheel Motorcycle"
Post a Comment